
My studio has changed its focus lately, or at least a corner of the studio that is. I have been wanting to paint sunflowers for a while now and went to work on this apron prototype last week. The results are fabulous! I hope to answer as many of your questions as I can in this week’s craft blog. However, do not hesitate to comment with a question at the bottom if I happen to leave your’s out. 🙂
Sunflowers are popping up all over the landscape here in North Georgia this month. Seeing them in all their glory moved me create my own canvas (apron fabrics) covered in sunny flowers. My artist friend, Sue King, does this all the time. She paints pillows and aprons using items from nature like leaves for stamping on neutral cloth. She heat sets the paint after it dries. I hesitated to do this technique in the past because i didn’t think it would be very durable. Turns out it is very durable. Sue showed me how durable it is when I realized how often she uses and then washes her painted tablecloth–its white cotton with leaf stamping in burgundy, browns, rusts, & greens.
I searched magazines and books and images on the web for ideas for sunflower designs and color. I had some green burlap to use for a ruffle trim on the apron and used that color green in the center of my design. I also painted the ‘seeds’ so that the fibonacci pattern was evident.
I wanted it to be somewhat realistic, but not perfect. I found a simple outline drawing in a color book to be the most useful when I began the process on the fabric. I sketched the design onto craft drawing paper to use as a visual aid as I worked on the fabric with the paints. I colored it with oil pastels. It seemed so easy to do, I was ready to begin on the fabric.
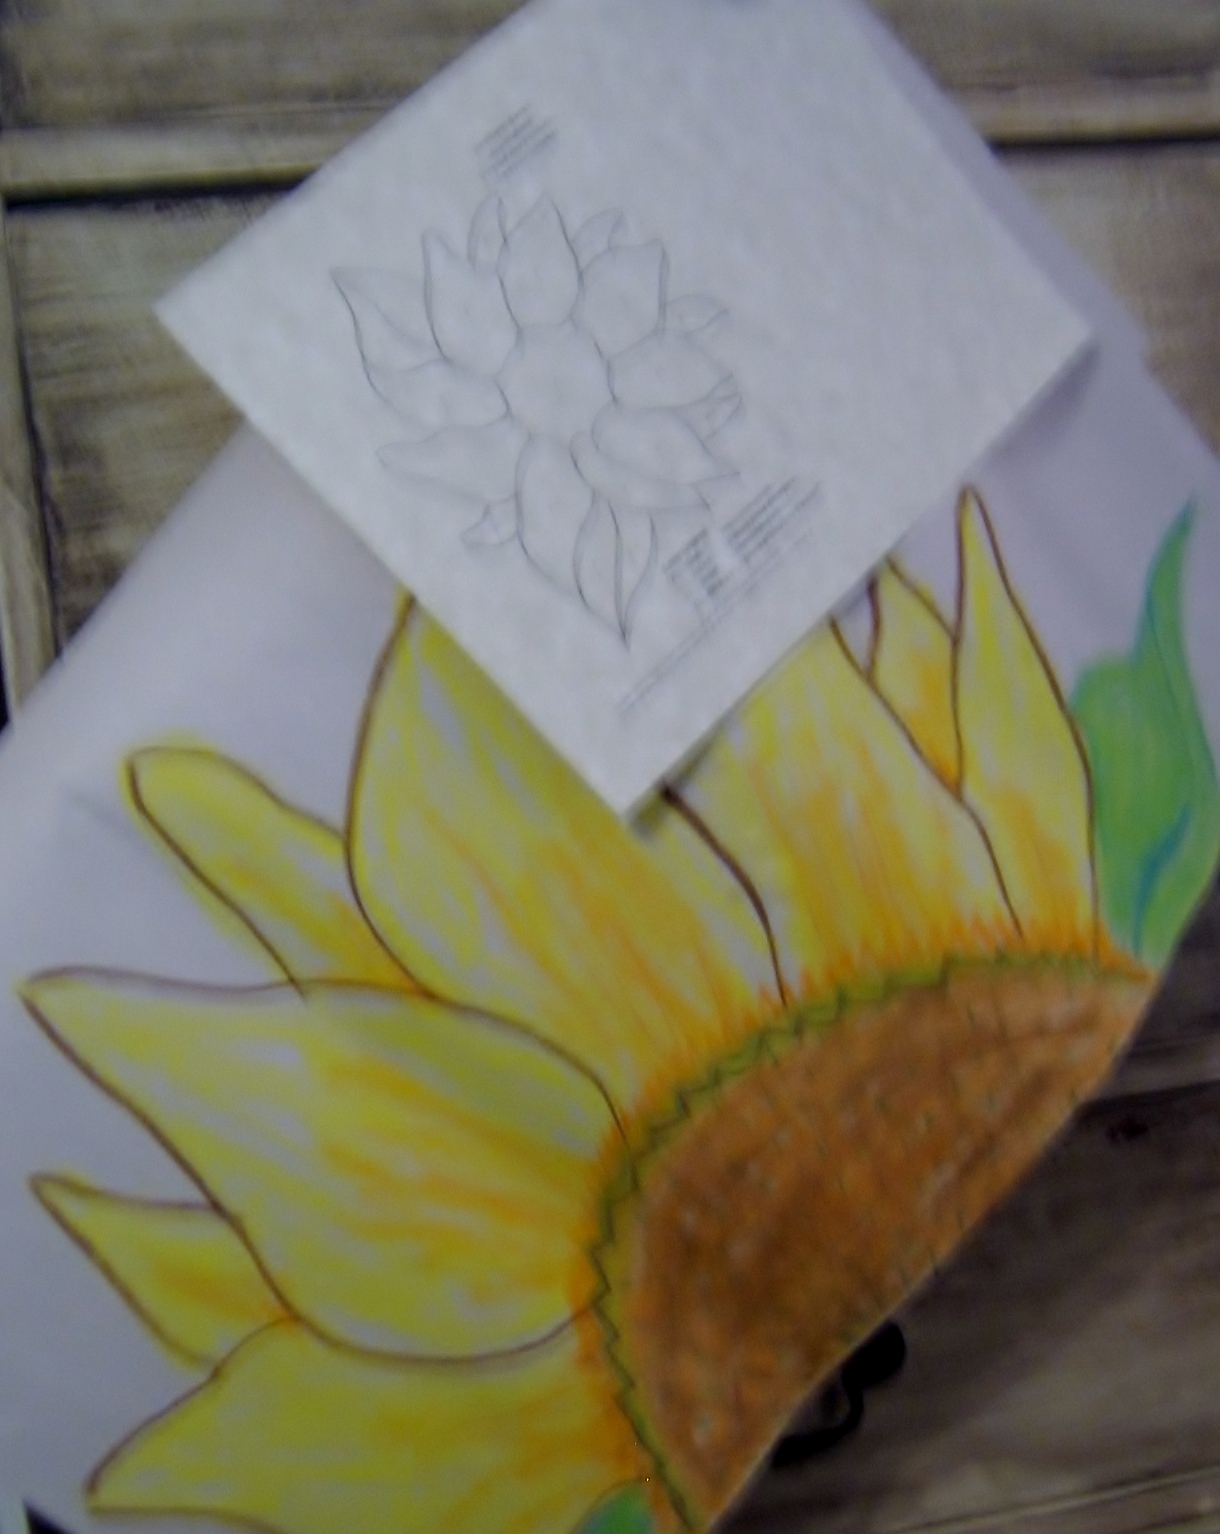
Sketch the design and color it.
I cut out several aprons from a lightweight ivory fabric in the studio stash pile. I taped it to a board to keep it smooth as I worked with it. That tip came from watching Sue in her studio. I sketched the design to the cloth, enlarging it from my drawing. And then I gathered the tools for the painting process and mixed my color palette. Before long I was fully absorbed in the process of creating my first sunflower apron. After I finished the first, I couldn’t stop. I was having too much fun to call this work! Which is why I love working in my Green Craft Studio. I get to make things that I love for others to appreciate and then love.
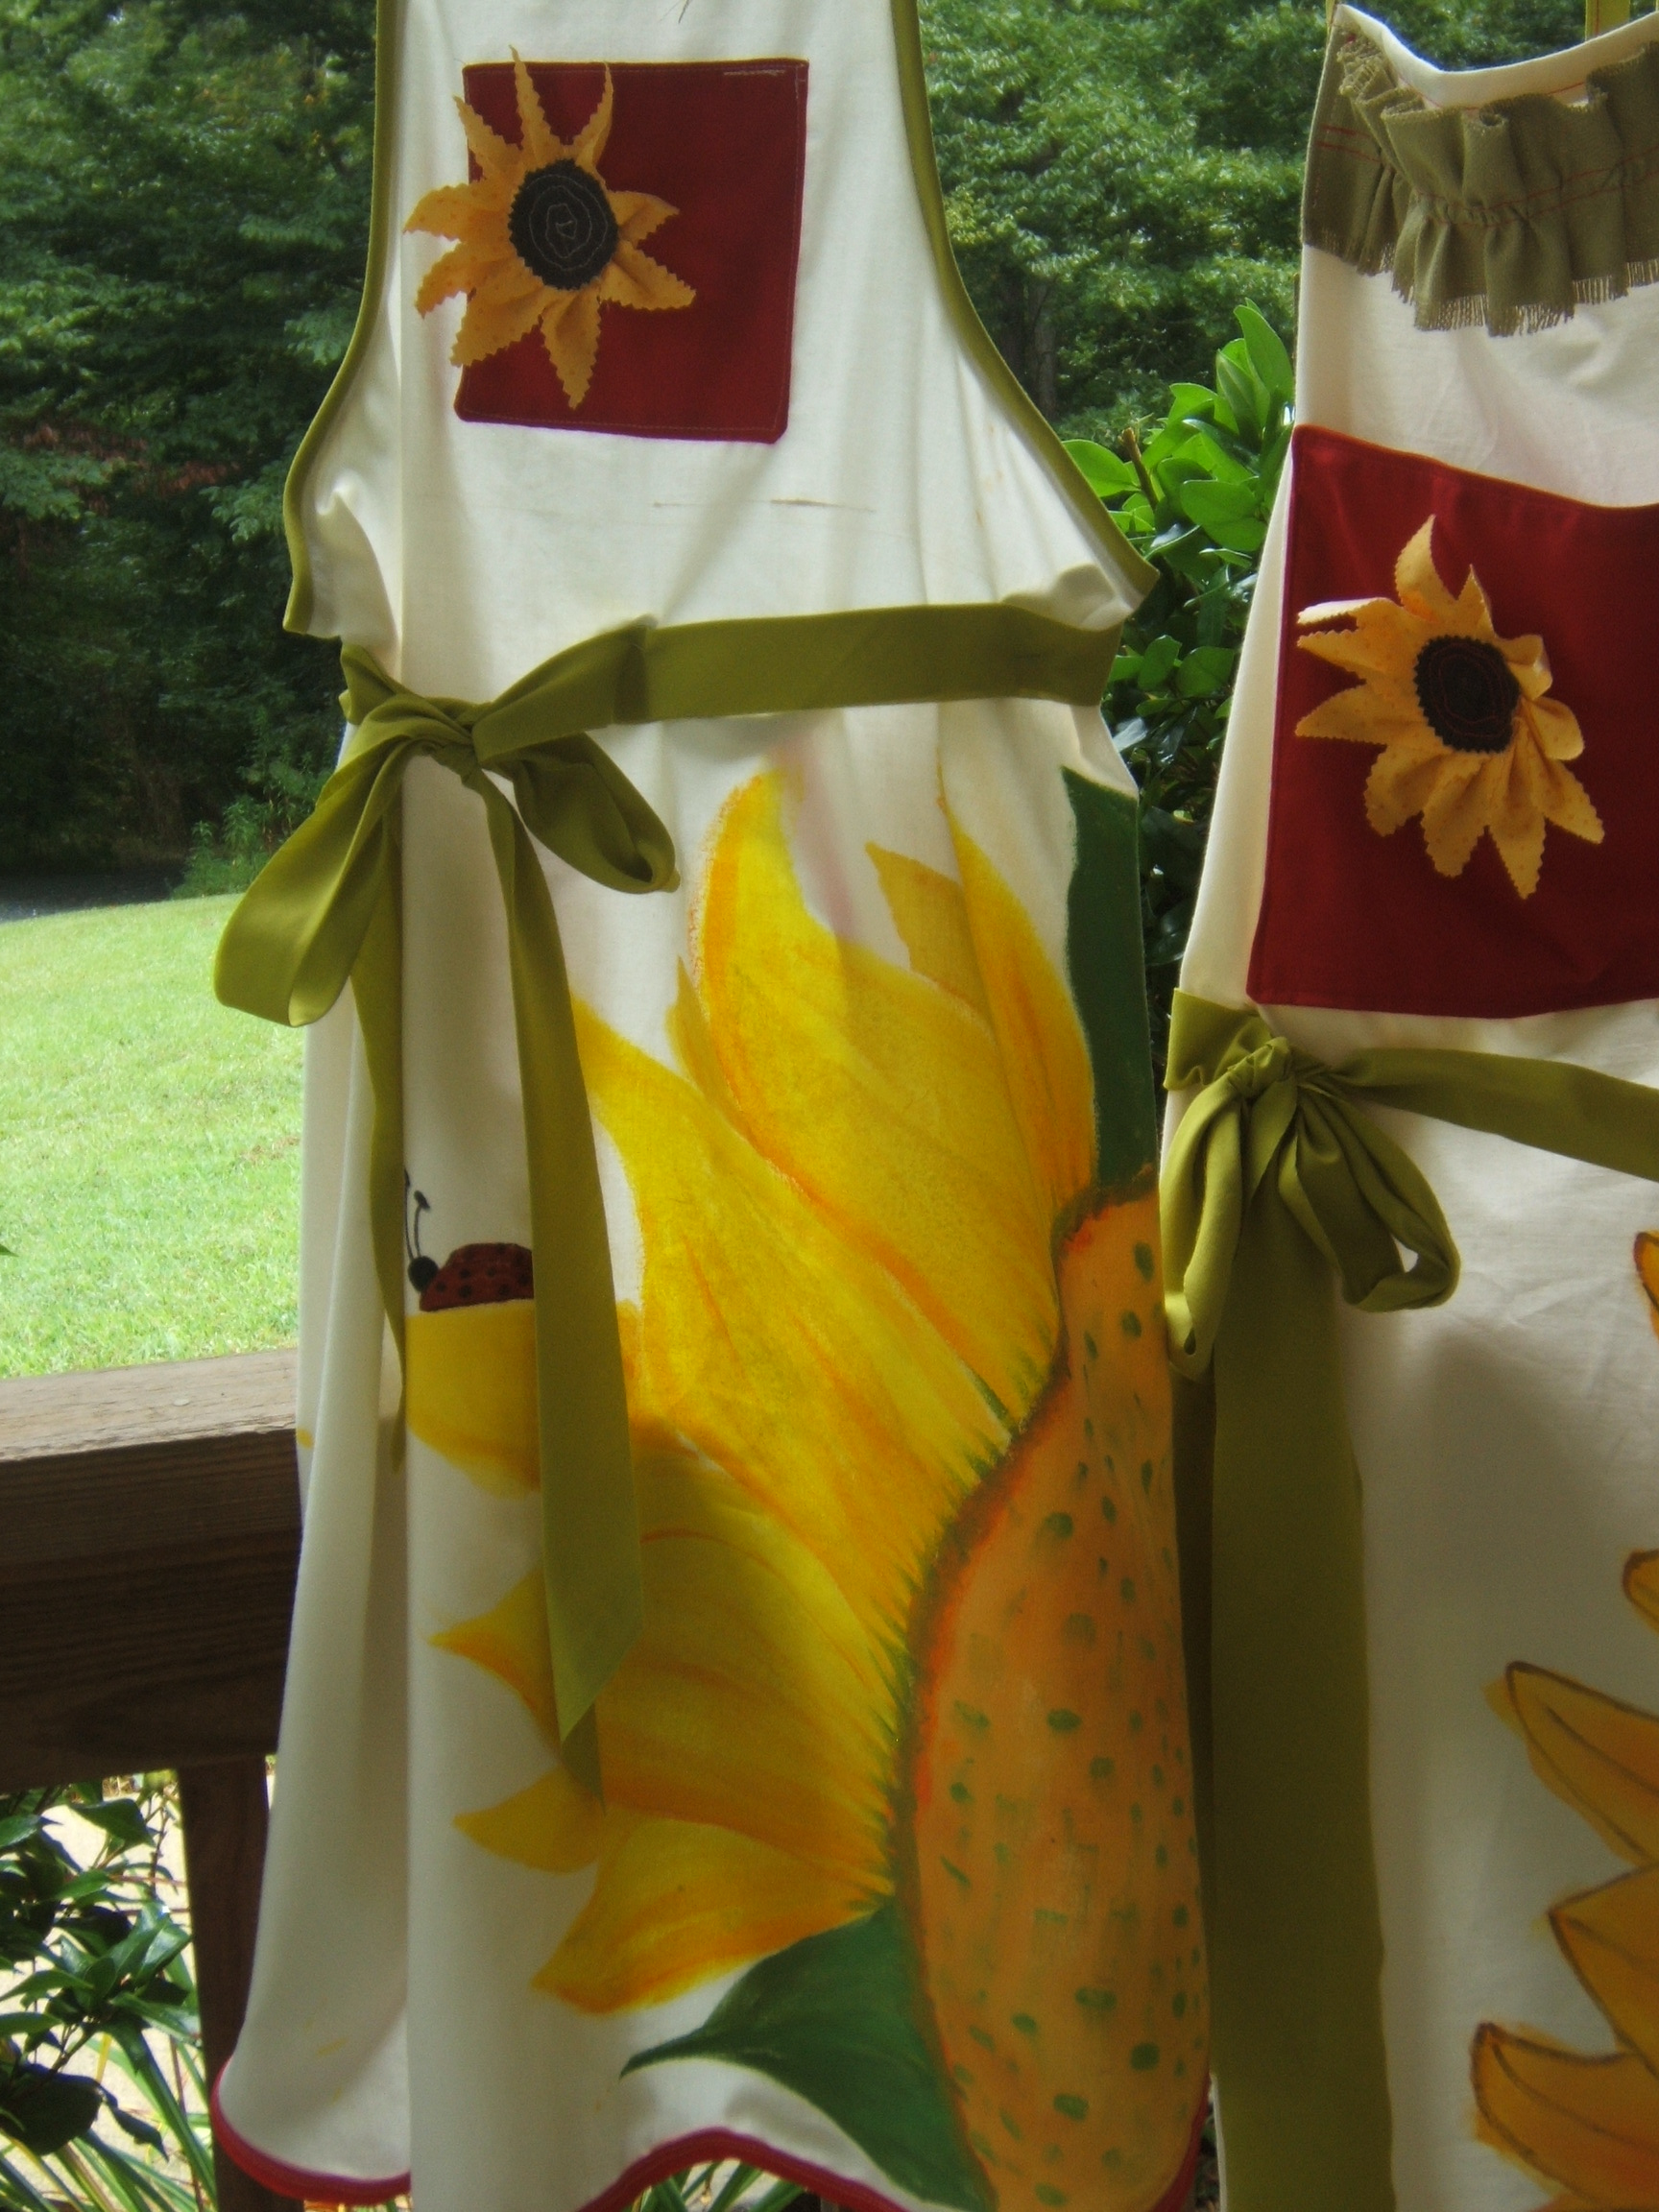
As I work on my second sunflower apron, a memory floods my mind and won’t let go. Its a memory of a photograph of my first home grown sunflower plant. (Here I am at the end of Summer 2014, creating a sunflower on fabric, and this memory pops up like the sunflowers I see in my current landscape.) The memory is vivid, and it moves me to add another dimension to this apron. A dimension that was not in my design drawing. It’s a ladybug! I didn’t see the ladybug until after we got the film developed.
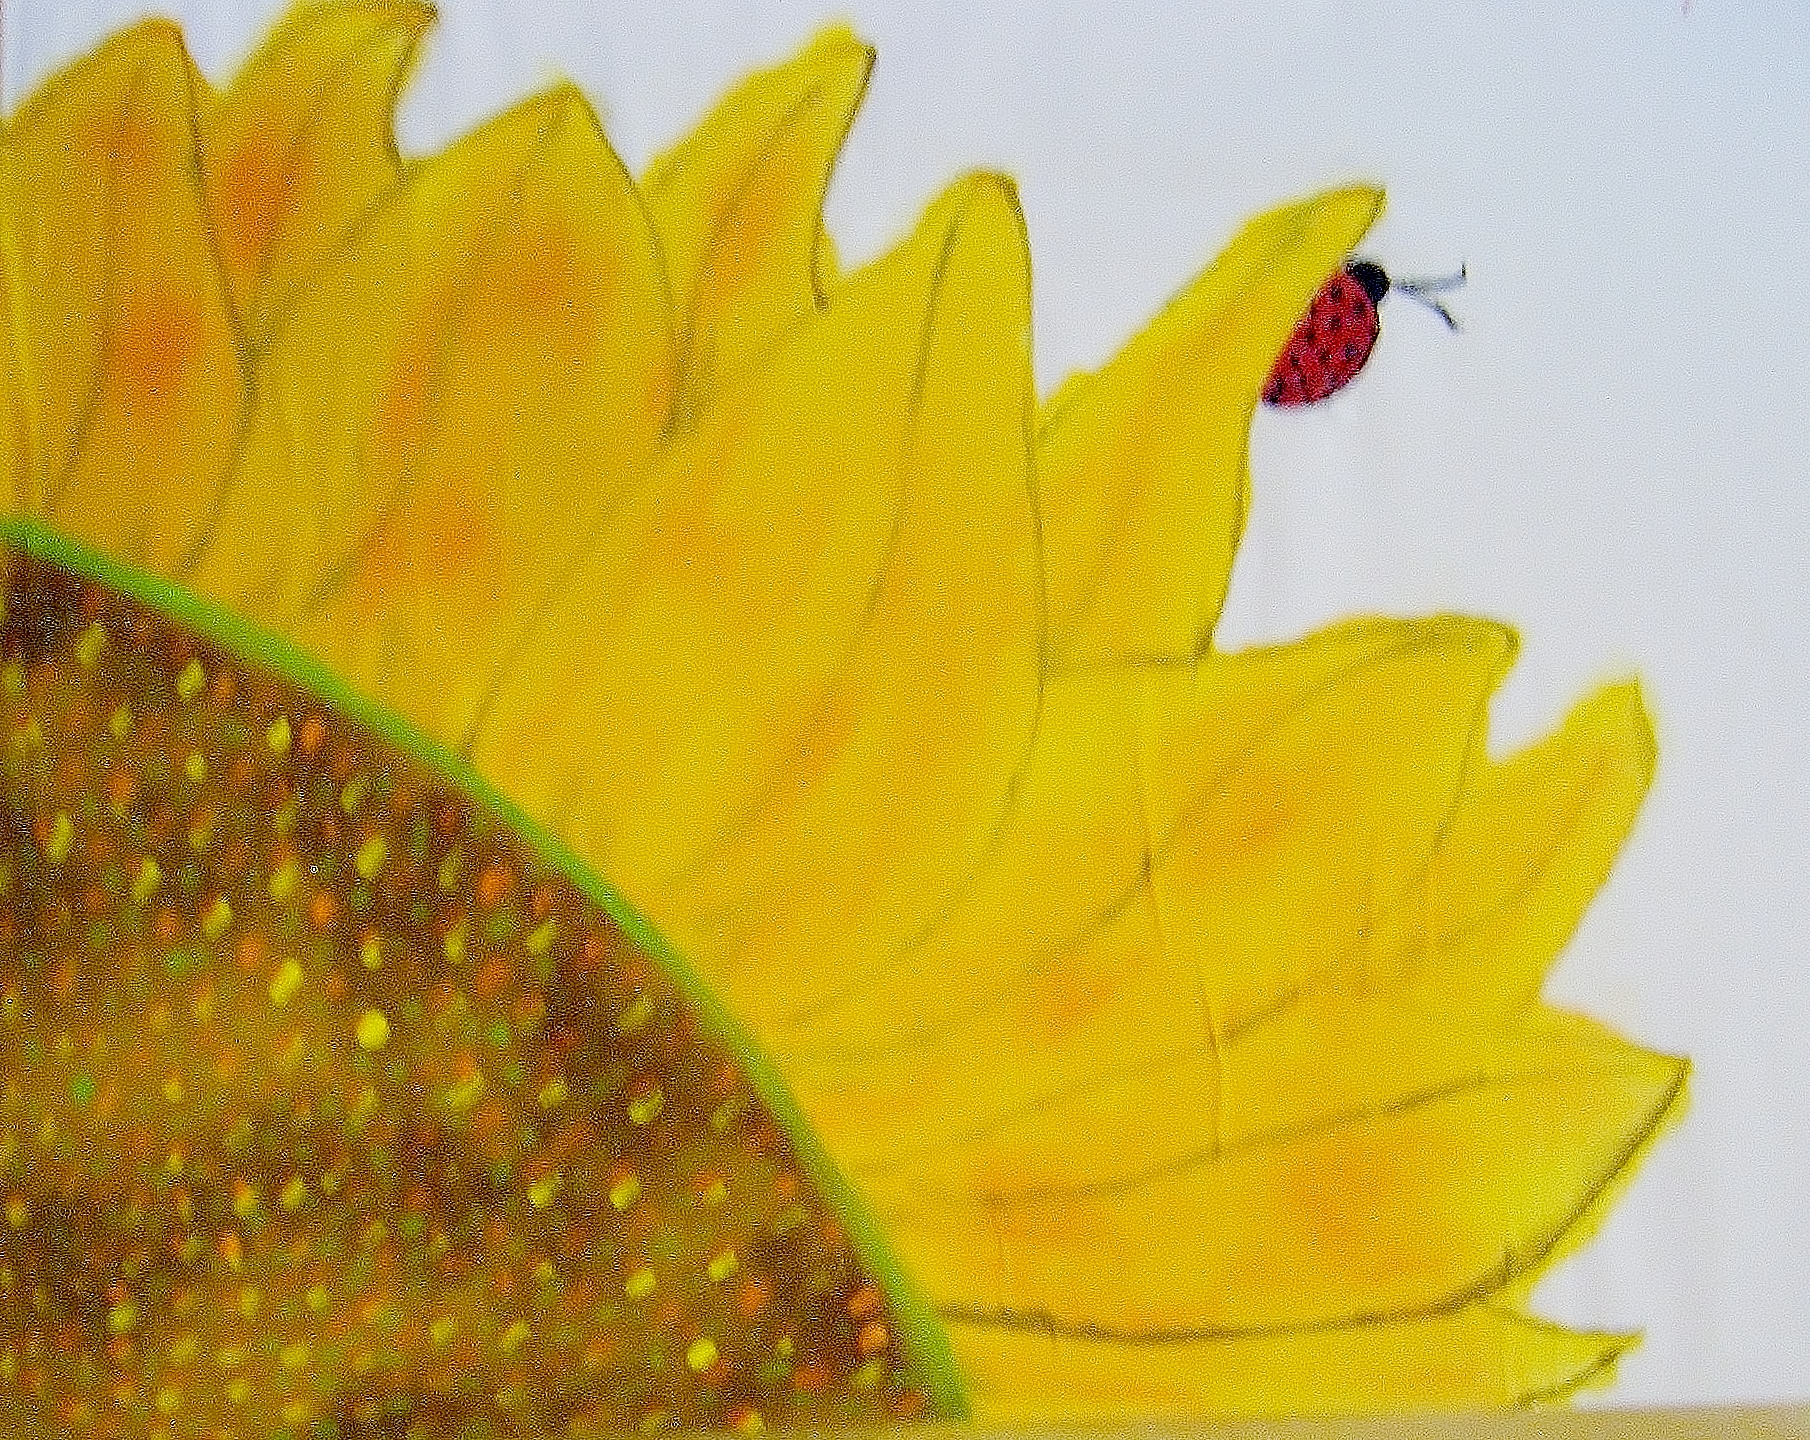
It’s a LADY BUG!
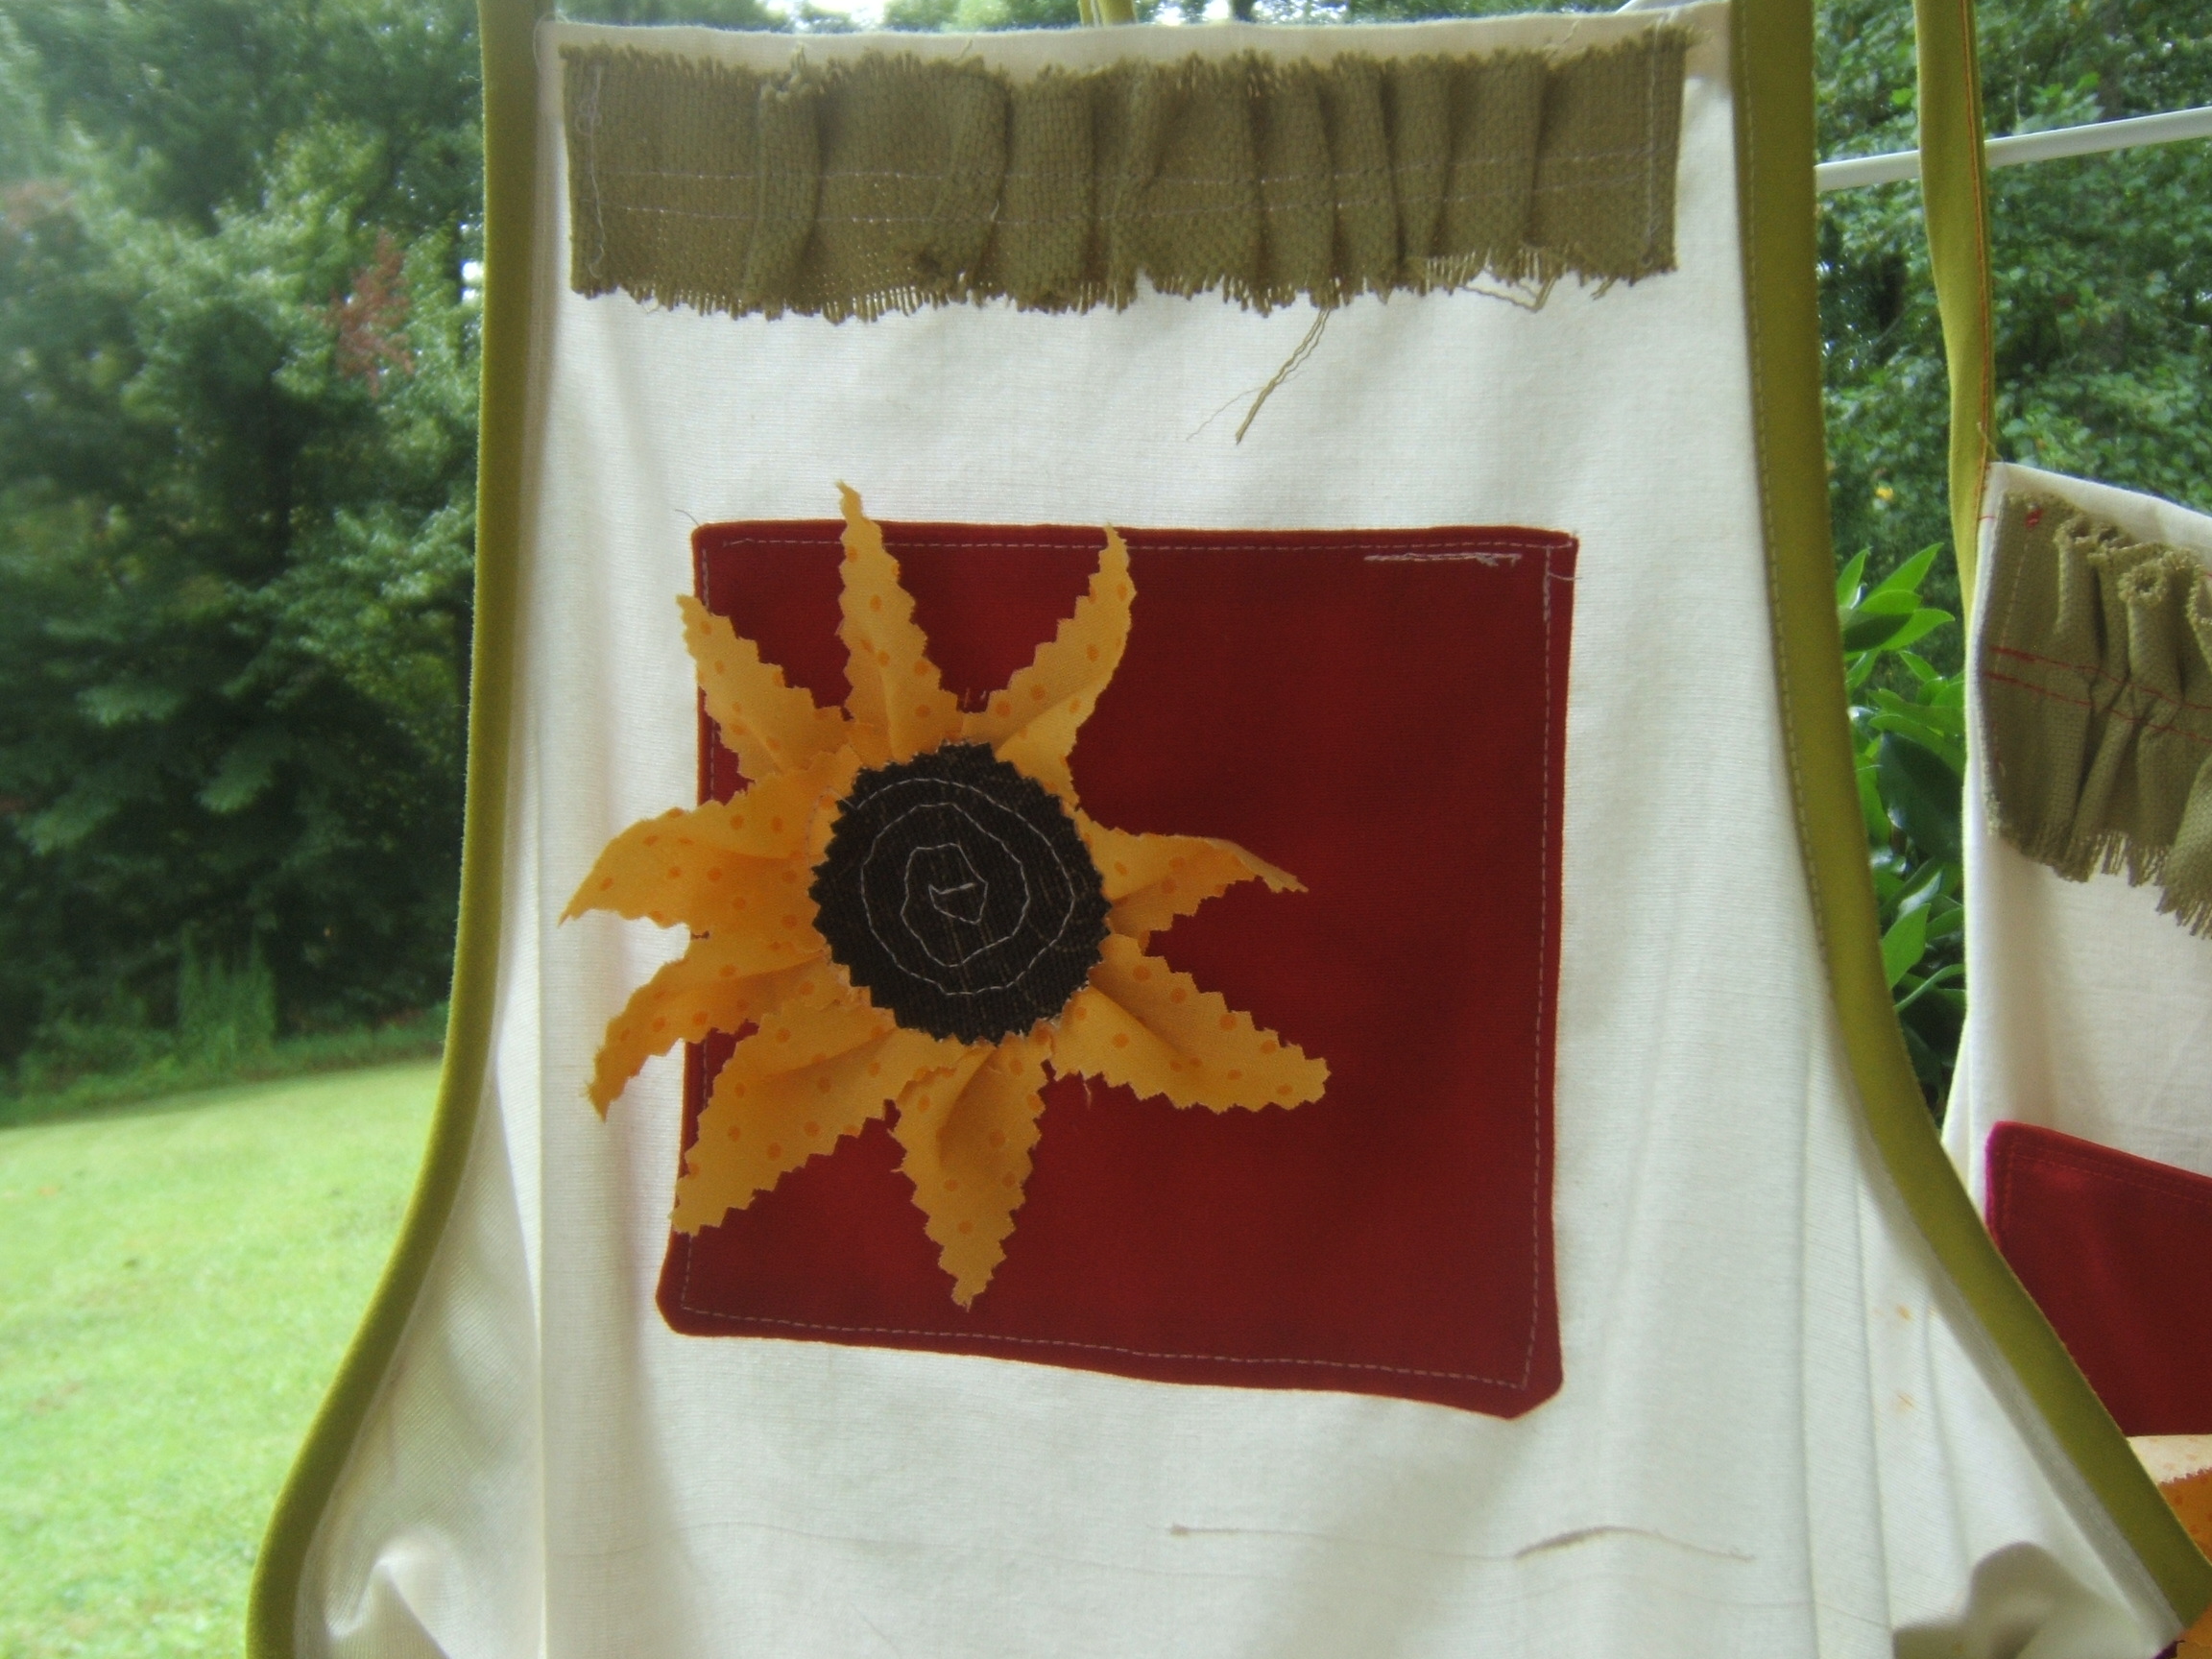
The added apron detail of the ladybug called for a red pocket accent to which I added a fabric flower applique to set the whole apron off. The green burlap ruffle trim finishes it perfectly.
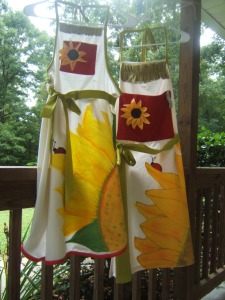
As far as the painting process goes, I started off using tiny brushes and then moved on to a tiny sponge roller for the big sections and the background coloring. The tiny flat sponge applicators worked well for the wide outline around the seed center. Paper plates and plastic spoons worked great for mixing the palette. I used acrylic craft paints in a matte finish. After the painted fabrics dried I heat set each painting from the back of the fabric using a low heat iron. I then washed them in cold water in the washing machine to test the paints. Durable! I dried them in the dryer and pressed them out before finishing the details of the pocket, trims and ties. One of these is going in my Etsy shop and another is going off to be reviewed for a blog feature in November. Elizabeth of Building Bridges Marketing was nice enough to reach out and I am excited to see what she says about my prototype painted aprons. November 16 is my feature date for her blog, so look for my Etsy shop feature article and read the review. It’ll be my first professional review and, quite frankly, I am on pins and needles!


